

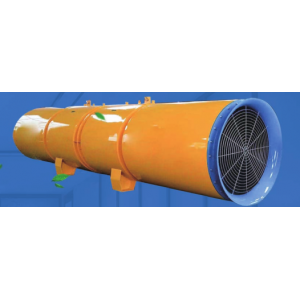
Installation requirements of the wall fan
The installation requirements involve multiple aspects. The following are the main installation requirements:
Determine the installation position:
The installation location should be far away from places where there are too many or too long turning in the exhaust pipeline to avoid affecting the exhaust capacity of the exhaust fan.
Avoid being installed at the ventilation outlet, windows, floor drains, etc., so as not to affect normal ventilation.
Consider the installation and disassembly needs of the exhaust fan for convenient maintenance.
The wall fan should be installed in areas close to ventilation, such as workshops, kitchens, etc. At the same time, the impact of fan noise and vibration on the surrounding environment is considered.
Installation height:
The installation height is usually 1.8 ~ 2.5 meters to avoid effective exhaustion from excessive or too low.
The installation height should not be less than 1 meter away from the ground to avoid problems such as water in and accumulating water.
Installation position and direction:
The side of the wall should be installed vertically and vertically with the ground and the wall to avoid vibration and noise.
When installing, avoid direct contact with the metal frame and cement wall surface, and rubber pads can be used for buffer.
The installation should be greater than 50cm from the corner of the corner to avoid the impact of the corner on the exhaust.
When adjusting the direction of the fan, you should pay attention to the direction of the air outlet in the direction of the ventilation.
Installation foundation and bracket:
After determining the installation position, the foundation needs to be installed.The basic role is to prevent it from moving or vibrating.The depth and intensity of the foundation depends on the weight of the fan and the degree of vibration during runtime.
Depending on the size of the fan and the reserved installation holes, the base and brackets are installed on the wall.Use electric diamonds to punch holes on the wall and install expansion screws to ensure that the base and bracket are firm and stable.
Connect the power and line:
Connect the wind and electrical line to the reserved power socket to ensure that the connection is firm and not loose.
Use an insulating tape to protect the electric wire to prevent an electric shock.
Test run:
After the installation is completed, turn on the power switch to test whether the fan runs normally.
Check whether the steering of the fan is correct to ensure that the direction of air circulation meets the requirements.
In addition, you need to pay attention:
Make sure that the installation location will not hinder the operation of other equipment.
During the operation and installation process, we should follow and obey relevant safety regulations to ensure their own safety.
Pay attention to the strength and stability, choose a strong wall for installation, and pay attention to the stability of the fuselage to prevent it from loosening or swaying.
Check whether the impeller of the fan is normal to ensure that the impeller rotates smoothly, and there are no abnormal conditions such as stuck and overlap.
Please note that the specific installation steps and requirements may be different from different fan models and manufacturers.Therefore, in the actual installation process, it is necessary to refer to the installation instructions provided by the fan manufacturer for operation to ensure the accuracy and safety of the installation.
 Pipe connection method of air
 Installation and debugging of
 Advantages and adjustment meth
 How to debug a centrifugal cur